After logging in to the switch for the first time, I had to give myself a crash course on the basics. How to save changes by dumping an office image, for example, and how to set the time when the system complains that the image dated 1976 is older than the existing ones.
Afterwards, the next big question was how to get into the ADMIN account. The ADMIN account on the SL-100 is a bit like the root account in a unix environment or the Administrator account on windows: Most of the usuals permissions and access control checking are waived for this special account, whose purpose is to ensure that even with bad configuration of permissions the switch can still be accessed for restoral. The caveat here is that the ADMIN account has some of it's own security restrictions, like having no existent way to change it's password without first knowing the password. In several manuals, Nortel warns that if the ADMIN password is lost, there is no restoring it without help from Emergency Technical Assistance Service (ETAS). They also note that while ETAS can assist, resetting the ADMIN password involves downtime for the switch.
Thankfully downtime is no big deal for my switch, and I figure I can come up with a method, even if it's not pretty.
The first task was to look around the disk images to see if I could find anything that looked like a user table. In truth, we had done this over a year ago when I initially took those disk images, but the general idea is to look for strings matching common account names. The files had to be byte-swapped to make sense of the strings since the SCSI drives were wide-SCSI and the XA-core is big-endian, resulting in some byte ordering mismatch.
I was able to discover that the XA-Core stores 4 copies of valid office images on each of the two HDDs, and as a result the user tables ended up being repeated multiple times on each disk. Through experimentation changing the password on the MONKEY account which I had access to, I was able to narrow down the password hash field. I was also able to determine that the password hash must be salted somehow.
Later, I also discovered a very useful document which explains some of the internal DMS-100 family data structures: TAM-1001-011. This was able to validate what I had figured out about the format of the user table.
My first attempt at changing the admin password was to try moving the hash and some of the other information over from the MONKEY account to the ADMIN account entries in the user table. However, I was not able to get this to work.
The next step, then, was to use the debugger on the SL-100 to determine what procedure is responsible for validating passwords during login. Afterwards, I could instrument that procedure to see what hash it was expecting to see so I could replace the hash on-disk.
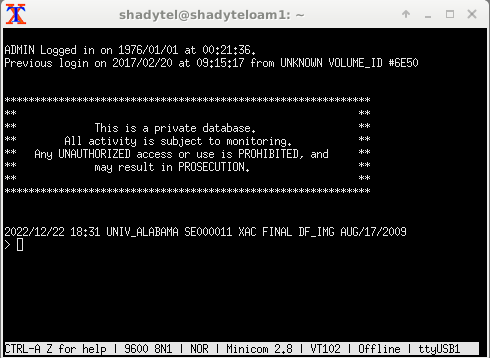
After fighting with some unexpected behavior in the debugger, I was able to craft a datapoint that showed the CCIDEFS:COMPARE_ procedure was accessing the password hash during login. Dumping the procedure revealed that I could instrument the right spot and dump a few registers to see what the hash it grabbed from the account table was vs. what it was expecting to see. After crafting a tracepoint to do just that, I was able to make an invalid attempt at logging in to the ADMIN account with incorrect password 'password' and capture the hash. This allowed me to replace the hash in the disk image and after I wrote it back to disk and booted the SL-100 again I was finally able to log in to the ADMIN account.
The first step is to remove the HDDs from the switch and image them. For this, I use a PC running linux equipped with a SCSI card. The HDDs from the XA-Core are just off the shelf wide-SCSI drives plugged into a bespoke PCI-SCSI host board that fits the XA-Core shelf. My preferred tool for drives that aren't failing is just regular old dd.
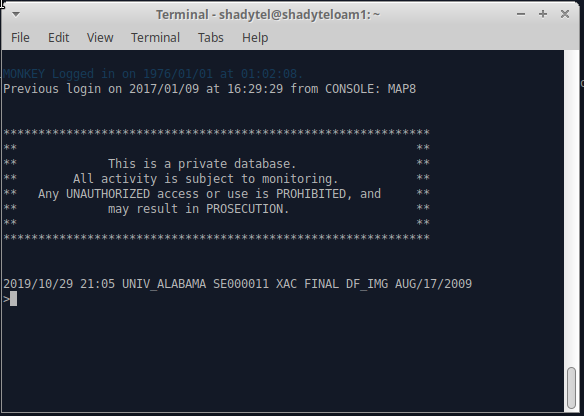
After taking an image of the drive, I can just search for an account name like 'MONKEY' in a hex editor to find a piece of the password table. I use 'MONKEY' because I believe it's one of the default account names, and it's usually high up in the list near ADMIN. 'ADMIN' on the other hand appears many times in places that aren't parts of the password table, so I don't search for that directly.
Now, it's worth noting about what I said with byte ordering earlier: strings will be byte-swapped due to endianness. This means that to find 'MONKEY' you actually need to search for 'OMKNYE'. It's also worth noting the DMS software is lazy about clearing the username field if a username is renamed, so try leaving off an odd trailing character if the account name you search is an odd number of characters.
There will be multiple password tables present on disk, one for each XA-Core image. Additionally, there will be multiple segments that make up a single table. The only reliable way I know of to narrow down which of the password tables is the active one is to change a password and see where it changed on disk. That can get tedious, so if your password tables are different enough, you might be able to examine memory with the debugger on the switch and compare with the tables on disk to see which one is actually being used. Last resort is that you can change all of the tables, which is more work but should also work.
65389be0 00 00 00 00 00 00 00 00 43 5a f2 3a 00 00 00 04
65389bf0 44 41 49 4d fd 4e fd fd fd fd fd fd fd fd fd fd
65389c00 27 10 fd e8 41 50 53 53 4f 57 44 52 20 20 20 20
65389c10 20 20 20 20 00 e5 b8 4f 52 5f f4 b1 07 e1 00 0c
65389c20 00 0f 00 07 00 34 01 eb fd fc 00 00 07 e1 00 33
65389c30 00 09 00 0f 00 11 00 0c fd fd fd fd fd fd fd fd
65389c40 fd fd fd fd 02 02 6e 50 0f ff ff ff ff ff ff ff
65389c50 0f ff ff ff ff ff ff ff ff ff ff ff c0 0c fd fd
65389c60 fd fd 4e 01 10 47 00 00 00 00 02 02 6e 50 00 00
65389c70 00 00 00 00 00 00 00 00 02 02 6e 50 00 00 00 00
65389c80 00 00 00 00 00 00 fe 8b 9e 84 01 f9 60 ec fc 4d
65389c90 ff ff 00 00 00 00 00 00 00 00 43 5a f2 ec 00 00
The above is the password entry for the ADMIN account from my disk. At 0x65389be8, the entry starts with a pointer to the name (0x435af23a), followed by a length of a sort (0x00000004 which actually means 5 characters). The pointer will be useful later for determining where in memory the password entry is actually stored.
Immediately after that, we have the username padded with 0xfd, followed by a 16 bit stack size, followed by the password field beginning at 0x65389c02.
The password field historically could store passwords in plaintext. There's likely some flags here to allow that, but basically what we're looking for are the last 8 bytes of this field for the hash, in this case 00 e5 b8 4f 52 5f f4 b1. That resides at location 0x65389c14, an offset of 0x24 past the name field. Adding 0x24 to the pointer from before gives us an address to the password hash field in memory on the XA-core, 0x435af25e.
Booting the switch and entering the debugger with the DEBUG command, we can set and activate the following datapoint and then attempt a login to the ADMIN account to see which procedure actually accesses the hash:
dp login1 #435AF25E FOR 4
timestamp
proctrace 6

trigger login1 read on
activate login1
Once a login attempt has been made, the datapoint can be deactivated and the results printed with the print command to determine the CCIDEFS:COMPARE_ procedure has accessed the hash from offset 0x00b0.
deactivate login1
print login1
...
HIT 1:
              from 02C7B610: CCIDEFS COMPARE_+#00B0
        during READ cycle while at USER level
TIME 1976/01/01 05:48:03.092
proctrace 6
02C77D84 CCIDEFS.BX01:CCI_CHEC+#00E4
015623E8 CIPROC.FD02:ATTEMPTL+#0208
0156461C CIPROC.FD02:STARTUSE+#071C
01565310 CIPROC.FD02:CIPROCES+#0050
00D3FBE0 MODULES.FS09:INITIALIZEP+#0020
00CE2E80 PROCS.HK03:LIVEANDD+#0020
Dumping the disassembly for the COMPARE_ procedure reveals that the password hashes are both in registers to do the comparison, so they can be grabbed if we set a tracepoint on offset 0x00b8.
02C7B610.00B0    lwz      r22,#0012(r5)
02C7B614.00B4    lwz      r23,#0016(r5)
02C7B618.00B8    cmpw     cr1,r22,r24
02C7B61C.00BC    cmpw     cr2,r23,r25
02C7B620.00C0    crand    4*cr2+eq,4*cr1+eq,4*cr2+eq
The tracepoint looks like the following:
def login2 ccidefs compare_ #00B8
display r all

activate login2
Attempt the ADMIN login again, and make sure to use the password for ADMIN to be changed to. I used 'password' since I would presumably be changing it immediately afterward. Then print the tracepoint with 'print login2' and look at the register output for R22 through R25. R22 and R23 will hold the existing hash, and R24 and R25 will hold the hash it was checking for, which is what we will be changing it to.
R22  = 00E5B84F  R23  = 525FF4B1
R24  = 0B971BA2  R25  = 953ACD6D
We can see that R22/R23 match our hash from the disk image earlier. With the contents of R24/R25 as our replacement, the changes need to be made in the disk image to replace the existing hash with the new one. However, this would result in a checksum mismatch when we go to boot the XA-Core again, so we need to ensure we fix that somehow. Since the checksumming is just a basic 16 bit checksum, all we have to do is ensure that any change to the sum we make as a result of the password hash change is countered by changing some other bytes in an equal and opposite fashion.
To do this, we subtract the each 16 bit number in the new hash from the old hash, compute the sum of these differences, and the result will be an additional 16 bit integer we need to add somewhere. Luckily the plaintext part of the password field gives us room to do this.
00e5 b84f 525f f4b1
0b97 1ba2 953a cd6d
---- ---- ---- ----
f54e+9cad+bd25+2744 = 7664
The result 0x7664 will need to be added to an aligned 16 bit field to offset our checksum. In the space immediately preceding the hash for the ADMIN account, there is some space padding (0x20) that we can add this to getting us 0x9684 to replace an 0x2020. This should work, but to avoid problems, I decided to break up 0x7664 amongst several places to keep the characters in the text field printable, at least. My resulting password entry is below.
65389be0 00 00 00 00 00 00 00 00 43 5a f2 3a 00 00 00 04
65389bf0 44 41 49 4d fd 4e fd fd fd fd fd fd fd fd fd fd
65389c00 27 10 fd e8 57 54 53 53 4f 57 54 52 50 50 40 50
65389c10 20 20 20 20 0b 97 1b a2 95 3a cd 6d 07 e1 00 0c
65389c20 00 0f 00 07 00 34 01 eb fd fc 00 00 07 e1 00 33
65389c30 00 09 00 0f 00 11 00 0c fd fd fd fd fd fd fd fd
65389c40 fd fd fd fd 02 02 6e 50 0f ff ff ff ff ff ff ff
65389c50 0f ff ff ff ff ff ff ff ff ff ff ff c0 0c fd fd
65389c60 fd fd 4e 01 10 47 00 00 00 00 02 02 6e 50 00 00
65389c70 00 00 00 00 00 00 00 00 02 02 6e 50 00 00 00 00
65389c80 00 00 00 00 00 00 fe 8b 9e 84 01 f9 60 ec fc 4d
65389c90 ff ff 00 00 00 00 00 00 00 00 43 5a f2 ec 00 00